The new Retro Assembler Extension for VS Code 1.3.0 is now capable of using IntelliSense and Code Completion to help entering Directives like .macro and it can display a short description and examples for each. Just type "." and hit Ctrl+Space to show the available Directives, or you can start typing what you need and hit Tab to insert the Code Snippet for the chosen Directive.
These helper entries don't list all possible parameters and full description due to the space limitation in the code editor window, but the most common cases are covered. It makes writing code a lot easier. For further information on the minute details you should still refer to the assembler's documentation.
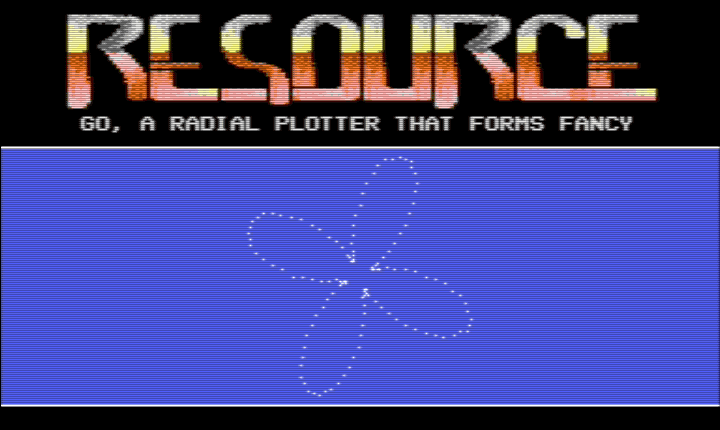
As I mentioned before, when I started out developing Retro Assembler, I had a demo in mind that I wanted to make with it as a starter project. I've done it, took some time, I worked on it between July 25 and August 10 – finished it just in time for the 19th Árok Party, a cozy 8-bit gathering held in Ajka, Hungary. I couldn't be there but some of my friends were, the demo was sent in for the Commodore 64 demo competition and to my surprise it won 1st place. I couldn't be happier with how things turned out with this little passion project, it was quite the confirmation that it was worth the time I spent on it.
I uploaded a video capture to Youtube (and this way I have my own Youtube channel, yay!), check it out! The imperfections are due to the 50Hz system vs 60Hz video capture differences.
Now if you're interested, I can tell you about some technical details. As you may know, the Commodore 64 has 64 kilobytes of RAM, that's about the size of a blank Microsoft Word document before compression. That's a challenge on its own. The demo, without loading from disk, uses way more RAM than that, about 90K to be exact, by generating most code and data for the plotter effect.
The demo runs on both PAL and NTSC systems alike, by detecting the system type and making the music play on its intended 50Hz speed on NTSC systems that use 60Hz screen refresh. This can only be achieved by skipping the music player call in every 6th frame. That can cause some audio artifacts, but this is all we can do to make it sound right. The home of Commodore 64 demos (and better games) is mainly Europe, despite the computer's American roots.
The main block of the demo takes up the first 14K of the RAM, it contains the framework that runs the demo itself, the scroller and the chessboard zoomer's code, music, logo, scroller font and text. Then from $3800 the effects use basically the rest of the available memory. I didn't bother using the register area between $d000-$e000, that would come with too many complications that I tried to avoid.
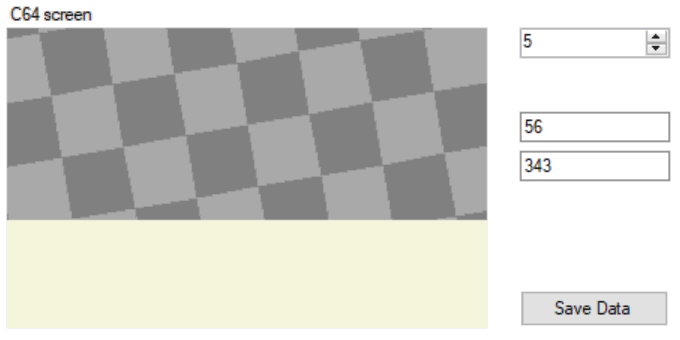
Chessboard Zoomer
It's an animation, but that doesn't make it less cool. It would be hard to make this run in real time on this hardware, in 320*128 pixels. The raw data for it is 36K, with 22 animation phases (with 640 bytes of character matrix for each, taking up 14K in total), squeezed into 11 character sets (2K each, 22K in total).
22 phases of this animation would give us only 180 degrees of rotation. Due to the properties of the chessboard and the loop I went for, I can fake the other 22 animation phases by swapping the foreground and background colors halfway. Originally I wanted to go for a smoother animation with twice the phases, but that turned out to be impossible to hold in the RAM. Since the animation would run way too fast if it got refreshed in every frame, I only step to the next phase in every 2nd screen refresh. That still makes it smooth enough to be enjoyable. Every 4th loop of the animation the color palette changes to make the effect more interesting, while I'm babbling about in the scroll text.
The animation was made by using this data generator I wrote back in 2010 (see, I did plan to make this demo for a while). I can step the animation manually, and it calculates how many unique characters (8*8 pixel blocks) the phase contains, and how many unique characters we need for the entire animation so far. This way I could experiment with the optimal size, rotation speed and zoom properties without wasting time on implementing the entire effect on the Commodore 64 itself, only to realize halfway that something doesn't add up.
Plotter
I love this effect, it's 128 plots forming cool blobs. I wrote something similar in a demo in 1997, only that couldn't refresh in each frame, unlike this one. Remember how the demo's framework and the chessboard animation took up 50K of the 64K RAM? When the chessboard disappears, I start the execution of a small program (2K) that generates 14K sine wave data and 13K unrolled code that can draw the plotter on the screen. With the effect's execution code, video memory buffers and all this generated stuff, it takes up about 40K RAM above the 14K for the framework.
The plotter refreshes during each screen refresh and takes up so much CPU time that it barely fits into the "raster time" as we call it. Due to this, to avoid screen tearing, it has to use double buffering. That means, we see the previously drawn animation phase, while we draw the next animation phase in the other buffer. Then switch. The code for it is highly optimized, with this flow:
Cleaner code, that deletes the previously drawn screen.
Plotter code modifier, that sets up the X and Y coordinates for each of the 128 plots in the plot drawing code itself.
Plotter code that draws the screen and modifies the cleaner code.
This way it's self-sustained, the plotter cleans up after itself in the video memory after each frame. Each buffer requires its own code because they draw to different memory locations, each requires 6.5K of code.
For the curious, here is a sample of the code that draws one plot out of 128. It would be a bit too complicated to explain what exactly it does, but in short, it draws a plot with a dynamic vertical shift applied to it (the blobs swing up and down, then leave the entire screen to switch animation style) after figuring out where to draw in the video memory, and updates the cleaner code for this buffer to clean up after itself the next time the code is called.
lda $6200
clc
adc $a2
cmp #$80
bcs (to Next plot code)
tay
ldx $6280
lda $aa80,x
sta $a0
tya
ora $a0
sta $e001
lda $ab80,x
sta $a1
sta $e002
lda $aa00,x
ora ($a0),y
sta ($a0),y
(Next plot code)
The plotter's execution takes up so much CPU time that I had to unroll even the scroll routine to make it all fit into a single frame. But as you may know, the NTSC systems work with 60Hz refresh and basically a smaller screen border, which results in smoother animation with less CPU time to use. The plotter uses two kinds of blob shapes, simpler ones and more complex ones with additional position calculations. The shapes are controlled by a playlist that modify the values of the plot position calculator and on NTSC systems I was forced to skip the complex ones. This way the demo runs smoothly on both video types, but the PAL version is more colorful, so to speak.
The demo takes up so much initial memory space, that the Commodore 64 kernel can't even load it into the memory without serious compression, for which I used Pucrunch. But this isn't a surprise, most C64 executables are compressed some way. Only in this case I couldn't even test the demo without compressing it first, once I put it all together into one file.
You may remember Epic Comeback, the small but punchy Commodore 64 demo I made last summer. There is a utility called C64 Debugger which, among other things, can visualize what's happening in the C64's memory while a program is running. This can reveal some interesting stuff, even if you are not that much into programming in assembly. I made a video of it, check it out in full screen!
Some of the observations that you can make...
‐ The memory activity colors are: Blue for reading, Red for writing, Green for mixed reading and writing.
‐ Upon a hard reset the Commodore 64's memory is initialized with a 00 00 00 00... FF FF FF FF... byte pattern, so you can see stripes in the visualized memory.
‐ When the demo is first loaded from disk, it takes up about 1/3rd of the 64K RAM. It's compressed though. First the decompressor copies the whole compressed data to the top of the memory, then starts working on it and fills up the memory with decompressed data from the bottom up. At one point the decompressed data starts overwriting the original compressed data (red line) while the rest of the data is still being decompressed (blue line). Red catches up at the end, just as the decompression ends, filling up nearly the whole 64K RAM of the Commodore 64. This is so much data that the C64 kernel couldn't load it from disk in a decompressed state by default.
‐ The chessboard animation is not too interesting in memory activity, it's mostly a character set based animation with a bunch of video matrices and video bank switching. On the bottom of the screen you can see the constant update of those zero page variables that the animation is using.
‐ When the animation goes away, the demo generates a bunch of wave tables for the plotter, this takes up about 1/4th of the RAM in the middle of the visualizer. The rest of the memory is filled up with two generated executable code blocks, one for each video buffer. The effect is redrawn on each screen refresh, but uses so much CPU time (well, all of it) that double buffering is necessary to avoid screen tearing.
‐ In the middle you can see the X and Y double-sine wave of each of the 128 plots (this looks awesome in the memory visualizer) applied to the lookup wave tables, to figure out where to draw the plots in the video memory. This is all reading, so it's shown with Blue color. The plotter drawing is pure writing, so it's shown with Red color above the waves.
‐ The generated plotter drawing code gets executed and self-modified all the time, as you can see it from the activity on the bottom part of the memory visualizer. As the plotter slides out of the visible screen area, less and less plots need to be drawn, so the memory darkens a bit until the next plotter configuration slides up into view.
‐ I did a hard reset at the end, so you can see how the memory is cleared up before the kernel initializes the BASIC interpreter, which is the default user interface of the Commodore 64.
If you want to use Retro Assembler to code on Linux (even on a Raspberry Pi) or on macOS, you have to install .NET Core on your computer. Normally you'd just go to https://dotnet.microsoft.com/download and follow the instructions, but if you need help, I'll try to provide some here.
Disclaimers
During the time of writing this guide, the current .NET Core version is 3.1. If there is a newer version by the time you read this, install that one.
Only the .NET Core Runtime is needed to run applications like Retro Assembler, so this guide focuses on that option.
This guide assumes you use Ubuntu Linux 19.10, or any of the recent macOS versions on Mac.
This guide assumes you use the Bash shell which is the default on most systems.
If you mess up something in your system, I'm not responsible for that.
Here download the .NET Core SDK installer (recommended), or under All .NET Core downloads..., pick the latest version and from the Run apps - Runtime column download the installer you need.
Click on the Install .NET Core button and on the page it opens, select your chosen Linux distribution. Or here is a direct link to the Ubuntu 19.10 - x64 page which lists the installation steps.
Here are the commands you'll need to enter into the Terminal:
#Download the Ubuntu 19.10 related packages for the package manager.
wget -q https://packages.microsoft.com/config/ubuntu/19.10/packages-microsoft-prod.deb -O packages-microsoft-prod.deb

#Install it for the package manager.
sudo dpkg -i packages-microsoft-prod.deb

#Install this utility.
sudo apt-get install apt-transport-https

#Update the package manager.
sudo apt-get update

#Install the .NET Core Runtime.
sudo apt-get install dotnet-runtime-3.1
Installing on Raspberry Pi and on other ARM based SBCs
You'll need to download the ARM32 binaries package and install it manually. Click on All .NET Core downloads..., pick the latest version and Run apps - Runtime column find the .NET Core Runtime (version) section. Download the ARM32 package from the Linux Binaries.
Rename this downloaded file to dotnet.tar.gz for easier handling below.
Here are the commands you'll need to enter into the Terminal:
#Install some possibly missing packages that will be needed.
sudo apt-get install libunwind8 gettext curl wget

#Make the dotnet directory where the .NET Core Runtime will be installed.
sudo mkdir /usr/share/dotnet

#Extract the files from the downloaded file.
sudo tar -xvf dotnet.tar.gz -C /usr/share/dotnet/

#Set up a symbolic link to this directory so it will be found on path
#when you type in the command "dotnet".
sudo ln -s /usr/share/dotnet/dotnet /usr/local/bin
This works perfectly, the only caveat is that you'll need to perform this manual install with every updated .NET Core version you want to use.
Testing in the Terminal
Run this command to check whether the .NET Core Runtime has been installed successfully. It will list the currently installed version's details.
dotnet --info
Now you can run Retro Assembler with this command:
dotnet retroassembler.dll
Optional, but it is recommended to edit the command shell's startup file with a command alias to run Retro Assembler with ease, as if it was a Linux/Mac native command line application.
Open your user's home directory and edit the hidden file .bashrc on Linux, or .bash_profile on macOS. The latter usually doesn't exist and you have to create it. Then enter this line into the bash file with your chosen file path:
alias ra='dotnet ~/PATH/retroassembler.dll'
This will allow you to just enter the command ra and run the assembler from either the Terminal or from Visual Studio Code.
If you want to use Retro Assembler to code on Linux (even on a Raspberry Pi) or on macOS, you have to install .NET on your computer. The current version is .NET 5.0 This used to be called .NET Core in previous versions, but Retro Assembler doesn't support those anymore. Normally you'd just go to https://dotnet.microsoft.com/download and follow the instructions, but if you need help, I'll try to provide some here. Especially for ARM-based single board computers, see below.
Disclaimers
During the time of writing this guide, the current .NET version is 5.0.2
If there is a newer version by the time you read this, install that one.
Only the .NET Runtime is needed to run applications like Retro Assembler therefore this guide focuses on that option.
This guide assumes you use Ubuntu Linux 20.10, or any of the recent macOS versions on Mac.
This guide assumes you use the Bash shell which is the default on most systems.
If you mess up something in your system, don't hold me responsible. But you should be just fine.
Click on the Install .NET button and on the page it opens, scroll down to your chosen Linux distribution and version. Or here is a direct link to the Ubuntu 20.10 page which lists the installation steps.
Here are the commands you'll need to enter into the Terminal:
#Download the Ubuntu 20.10 related packages for the package manager.
wget https://packages.microsoft.com/config/ubuntu/20.10/packages-microsoft-prod.deb -O packages-microsoft-prod.deb

#Install it for the package manager.
sudo dpkg -i packages-microsoft-prod.deb

#Update the package manager.
sudo apt-get update

#Install this utility.
sudo apt-get install apt-transport-https

#Update the package manager (again).
sudo apt-get update

#Install the .NET Runtime.
sudo apt-get install dotnet-runtime-5.0

#Alternatively, Install the full .NET SDK
sudo apt-get install dotnet-sdk-5.0
Installing on Raspberry Pi and on other ARM based SBCs
You'll need to download the ARM32 binaries package and install it manually. Click on All .NET downloads..., pick the latest version and in the Run apps - Runtime column (on the right side) find the .NET Runtime (version) section. Download the ARM32 package from the Linux Binaries.
Here is a direct link to the now-latest version ARM32 5.0.2
If you use a 64-bit OS, you may need the ARM64 package.
Rename this downloaded file to dotnet.tar.gz for easier handling below.
Here are the commands you'll need to enter into the Terminal:
#Install some possibly missing packages that will be needed.
sudo apt-get install libunwind8 gettext curl wget

#Make the dotnet directory where the .NET Runtime will be installed.
sudo mkdir /usr/share/dotnet

#Extract the files from the downloaded file.
sudo tar -xvf dotnet.tar.gz -C /usr/share/dotnet/

#Set up a symbolic link to this directory so it will be found on path
#when you type in the command "dotnet".
sudo ln -s /usr/share/dotnet/dotnet /usr/local/bin
This works perfectly, the only caveat is that you'll need to perform this manual install with every updated .NET version you want to use.
Testing in the Terminal
Run this command to check whether the .NET Runtime has been installed successfully. It will list the currently installed version's details.
dotnet --info
Now you can run Retro Assembler with this command:
dotnet retroassembler.dll
Optional, but it is recommended to edit the command shell's startup file with a command alias to run Retro Assembler with ease, as if it was a Linux/Mac native command line application.
Open your user's home directory and edit the hidden file .bashrc on Linux, or .bash_profile on macOS. The latter usually doesn't exist and you have to create it. Then enter this line into the bash file with your chosen file path:
alias ra='dotnet ~/PATH/retroassembler.dll'
This will allow you to just enter the command ra and run the assembler from either the Terminal or from Visual Studio Code.
I spent the majority of my childhood and my early adult life coding a lot of demos and a few games on Commodore 64 and Plus/4, in assembly. Later I also worked on demos for the Amiga and Gameboy Color. I miss those days a lot, and in the recent years I had this recurring urge to write a new C64 demo. Or at least do something in assembly because it's just fun. After spending quite some time reading up on the ins and outs of ARM V7 that I could code for in my Raspberry Pi, I realized that it's just silly to go down that route. The Pi hardware is surprisingly poorly documented, people are just guessing or reverse engineering Linux distributions to figure out how the GPU's screen buffer can be accessed, mail slots and messaging, ummm no thanks. I can spend my time a bit more wisely, and my heart is captured by the Commodore 64 forever anyway.
My friends and I used to code in an awesome utility called Turbo Assembler, it's still a fascinating piece of marvel. It loaded to the memory address $9000 and upwards, and the tokenized source code was building downwards from there, so it left us plenty of work space in the 64 kilobytes RAM that the Commodore 64 and Plus/4 were built with.
Back in those days I wished I could write my own assembler, but I couldn't even imagine how I could do that effectively, with at least the same features I used in Turbo Assembler. Then decades passed, I worked on a bunch of serious software, and suddenly it didn't sound impossible anymore, just a bit challenging. I decided that if I'm going to code a new demo (or twenty), it must be done in my own assembler. I got to it, started working on the project on a Sunday morning on June 18th, and by the next Saturday it compiled the first test source code, a music player.
Retro Assembler was born.
Retro Assembler – Commodore 64 source code in Notepad++
After a month of work on it (not full time, just evenings and weekends), it's ready to be published. It's so advanced that it could easily be called a version 2.0 but I'll just go with a solid 1.0 for good measure. I'm afraid I got a bit carried away with it (in the meantime my wife Leslie binge-watched all five seasons of Orange Is The New Black), now it's a macro assembler with a lot of serious features. I made it to support the MOS6502 microprocessor family, so most Commodore computers and some early game consoles (Nintendo NES, Atari 2600 etc) can be targeted with it. But it's not all it will ever do. The application was designed in a way that adding other CPU types is doable with moderate amount of work, so in a future release the Gameboy CPU will be supported too, and shortly after the Zilog Z80 as well. I might even code something for the ZX Spectrum I never had. Motorola 68000 and perhaps ARM may be supported as well, but those can wait.
Versatile memory management using relocatable Memory Segments
Global, Local and Regional labels
Complex expressions and operators
Various control Directives
Nested source code include files, binary includes, custom include paths
Powerful Macro capabilities with parameters and default values
Loop, If and While directives for advanced code building
Byte, Word and String management in memory
Data generators (Need a Sine Wave in your demo? Got it!)
Bin, H6X, T64 and D64 output formats, that work great with the WinVICE Commodore 64 etc Emulator
Disassembler
Syntax highlighting in Notepad++ by custom User Defined Languages
The assembler is a command line tool that can be wired up in Notepad++ (and other editors) to turn it into a Development Environment with Build & Execute
I guess that's good enough for an initial release. I don't expect too many people to start using it, but even if nobody ever downloads it, I don't mind. I'm really proud of this assembler and now it's time for me to start working on that demo. Fellow sceners, I'm back!
Retro Assembler Version 1.1 is ready with improvements and bug fixes.
Among other things, the new .memory directive lets you perform byte manipulation in the target memory. This is useful for ad-hoc data duplications, conversions or other modifications.
Retro Assembler Version 1.2 is ready with 65C02 and 65SC02 CPU support.
After the last release of V1.1 I received a lot of support and encouragement from Commodore 64 and 6502 enthusiasts on Facebook, it was nice. As a result of it, the assembler has been fixed to work on Linux using Mono, I even set up my dusty Raspberry Pi 3 with an environment that can run it.
I began researching other CPU types and ended up adding support for the 65C02 and 65SC02 CPUs. They looked like small updates at first with a few new instructions, but the 65C02 has these weird bit instructions that combine a zero page address for bit testing and a relative address for branching. That was a bit of a trouble for the assembler, as it couldn't deal with instructions that use two parameters. However, it was added and it works nicely.
I also realized that I didn't address the D64 maker option for Linux, which was clearly made for Windows, using "c1541.exe" under WinVICE. I can't really test that one (yet), but I changed the call to use "c1541" and we will see if it works. If you can test it, let me know, I'd appreciate it. Alternatively I put the command line call into the ReadMe.txt file that you can use on Linux, to get a D64 file out of a T64 file.
A new, completely refactored and updated Retro Assembler is here!
A lot has changed since the last version, both in the assembler and in the world of computing alike. It's clear now that .Net Core is a thing, it's available on numerous operating systems which makes it possible to do true portable app development in C#. And also Visual Studio Code is becoming a mature product, available for most people, no matter what their favorite OS is.
I'm happy to announce that Retro Assembler has reached version 2.0 and after serious refactoring and improvements is now available as both Windows (.Net Framework 4.7, runs on Mono too) and Portable (.Net Core 2.1) builds. Not only that, it's even integrated with Visual Studio Code via a custom Extension, making it a powerful development tool for all the popular operating systems.
Retro Assembler in Visual Studio Code
There's more! Now it's a full-fledged development environment for Nintendo Entertainment System and Nintendo Gameboy with the recently added Gameboy CPU and ROM support.
The target memory management got completely overhauled, now there is no practical memory limit for the projects, as long as they fit into the 32 bit address space. Labels and values can be up to 32 bit numbers. The Segment support has been changed, now combined with Banks it can do a lot more than before. If you used .target and .segment directives, update those in your source code files to the latest specification. The command line options also changed, be aware of that.
See the documentation for details, there are a lot of additions and changes to read up on.
Support for the 65816 CPU is here, along with the SNES ROM output format. Adding this CPU was not possible in the 1.x days, but with the new foundation it wasn't too hard. Since this CPU is a special one with 8 bit and 16 bit modes and 24 bit address size, I had to add some special things.
By prefixing a number with 0's, you can enforce a different number size. For example lda #$0012 will be compiled as a 16 bit number even in 8 bit mode.
The RegA16 and RegXY16 setting flags can enforce 8 or 16 bit value usage, so an lda #$12 can be compiled as lda #$0012 if needed.
The disassembler follows the Accumulator and Index register size selector CPU flag states to show properly decoded source code for sequentially placed instructions.
Other changes:
Alternative binary number format added: 0b11110011
Octal number format support added: 0o17
Hexadecimal and binary numbers can use the '_' (underscore) character as visual value separator: %1111_0011, $12_34
The disassembler can limit the number of disassembled bytes in a file.
SNES ROM (.sfc) file support with header builder and checksum calculator.
I didn't plan to put out an update so quick, but a friend suggested some changes and I went for it, plus added some other useful things. I adore this project!
The assembler can now auto-start a successfully compiled code file by using the settings LaunchCommand and LaunchEnabled. The assembler will start the command as a new process, if launching is enabled, and all this can be managed in each source code file.
If launching is disabled but there is a launch command set up, VS Code's Build & Start command is still going to auto-start the code file, so this way you can keep Building without starting anything, and only start your code in an emulator when you use the keyboard shortcut you assigned to the command Build & Start
You can create a retroassembler-usersettings.xml file based on the default settings file, where you can keep your customized settings without the fear of overwriting it by an updated assembler package.
The assembler now periodically checks for updates and will notify you when there's something new to download.
"Include" (with capital I) directories are now mapped in on case-sensitive file systems, alongside with "include" directories.
The Visual Studio Code Extension has been updated and it no longer uses the retroassembler.start user setting value.
The new version is out with a quite a lot of goodies. It took a while to implement all this, but it was worth it.
The Zilog Z80 CPU has been added to the list of supported CPUs, so now the assembler covers most of the classic home computers.
File formats for Sega Master System and Sega Game Gear ROMs have been added, along with TAP file support for ZX Spectrum 48K projects.
The expression evaluator now can handle complex expressions in Instructions and Macro function calls too. It used to work that way only for Variables, but now it's up to you to manage values using parentheses everywhere. It doesn't interfere with the parentheses used in the instruction addressing mode, if you do it right. When in doubt, just keep using a Variable to build your complex expressions.
Bitwise-NOT number manipulation has been added.
Light scripting is possible using the BeforeBuild and AfterBuild setting values that may appear multiple times in the source code.
The Visual Studio Code Extension has been updated, along with the Notepad++ support files to show the Register names with a more distinct color. The need for this became quite pressing in Z80 source code files.
If everything goes right, this will be the first time current users will be notified about a version update by the assembler itself. Exciting times!
As it happens, while I was working on an assembly project, I ran into some shortcomings that I tried to fix in this new release.
There was no way to just allocate bytes in memory, without actually writing data into the virtual memory. This normally isn't a problem in Commodore 64 projects, but in Gameboy projects the code is in ROM and the RAM is separated from it. Even though the ROM builder would ignore those bytes, words and arrays that you'd put between $c000-$dfff, it's not too elegant to write the code that way. Now it's possible to just allocate bytes these ways:
The directives .align and .storage now only allocate bytes in memory, if the Filler byte parameter is not set.
The directives .byte, .word and .dword can allocate bytes in memory, when the value is set to ?
New directive .end added. It terminates the source code loading at that line, the rest of the lines are ignored.
Boolean values true and false now work everywhere where you expect them to work, such as in directives like .equ, .var, .if, .while, and also in .macro arguments and their default values.
Using of single character Labels is allowed (used to be forbidden), as long as it's not a match to a Register name in the selected CPU type. For example you can't use a / x / y as label names in 6502 code, but b / c / d are allowed.
Functions made by the .function directive no longer require brackets for the function definition, but they are still needed for the function call. It's just for alternative formatting.
This is just a smaller bug fix for Linux. I noticed that the Windows version doesn't run on Ubuntu Linux using Mono, mainly because of the Gnome Terminal's default TERM environment value. It's set as xterm-256color while Mono apparently needs it to be set as xterm, otherwise it fails when the Console is accessed. This can be remedied from the user's login script like in .bashrc but I fixed it from software for the application's thread.
Then there was another bug that happens only with the x86-64 version of Mono, it always worked fine on ARM. That issue has been fixed too.
Either way, I still recommend using the .Net Core version on Linux and macOS.
I had a couple of small bug fixes to do and in the same time I took the opportunity to update some directives, add new ones and work on the documentation a bit.
New directive .encoding added. It controls how the directives .text and .textz turn strings into bytes.
New directives .textz, .ascii and .asciiz added for finer control over text strings.
Directive aliases .txt, .st and .stxt dropped to make things clearer.
The directive .debug has been renamed to .print, but .debug is still an accepted alias. Alias .out dropped.
New directive .error added. It prints a user raised error message on the console and stops the compiler.
Error handling has been improved in source code processing.
Standalone labels now produce warnings if they look similar to instructions, which may be a typo in the source code.
The Notepad++ language files and the VS Code extension have been updated to support the new directives.
It's a small but useful update for those who use the Visual Studio Code Extension, which is recommended for the best coding experience.
The display format of errors and warnings got tweaked a little to display a clickable link that allows Visual Studio Code to open the referenced source code file at the problematic line number.
Unfortunately in such links Visual Studio Code doesn't correctly recognize paths with spaces in them (yet), but I chose the best option (quotes around the filename) that will likely be handled by it in the future.
I also added a new output file format called SBIN which is similar to the PRG format, but the file data length is also saved into the header, making it typically 4 bytes long.
The rest of the important changes are in the Extension which is now elevated to version number 1.1.0
There is a MainFile setting where you can set the main source code file of the project that should always be compiled, instead of the currently open and edited file.
Source code files with spaces are now handled correctly when they are sent to the assembler for compilation.
An issue with macro calls using too many parameters has been fixed.
Saving the "[CodeFileName]-Info.txt" file by default is unnecessary for most users, so this has been turned off in Settings. It can be turned back on even on a per-project basis when needed.
The assembler project is now built exclusively for .NET Core 3.1 and it's a single portable package for Windows, macOS and Linux, running on X86, X64 and ARM architectures.
The .NET Framework 4.7 version is now discontinued. Microsoft basically deprecated the .NET Framework, with the next version they will merge everything into .NET 5.0. Hopefully at that point Windows Update will install it for everybody on Windows, but until then .NET Core needs to be installed manually to make Retro Assembler work.
For simplicity, the assembler's version number has been changed to the modern style Year.Release, kicking off with 2020.1
The following changes have been made since the last update:
New Setting DefaultScreenCode added to control the encoding Type and Case that the ".stext" directive uses for character code conversion.
The Setting OmitUnusedFunctions is no longer Enabled by default to avoid issues with existing source code. It can be enabled on demand.
When a file is included using the .include or the .incbin directive, the file's Directory is automatically added to the list of Known Include Directories. This way a file loaded with full path can include subsequent files without specifying the full path of those nested files.
Long Branch Handling now works within Macros, too.
This is a quick update for to fix a nasty little bug in the parser and compiler.
The problem was with the number size detection of currently-undefined labels. An lda <Label or lda >Label instruction, or similar ones using a zero page address would process the memory address of Label incorrectly, when Label is defined after the instruction's code line.
Friend of the project, John Tsombakos was kind enough to write up a reproduction case about it. Thank you John!
Empty Macros get removed from the compiled code automatically. These caused some local label issues.
When the Setting OmitUnusedFunctions is Enabled, empty Functions and their standard, correctly formatted calls get removed from the compiled code.
When the Setting Debug is Enabled, a text representation of the compiled code is saved alongside with the normal debug information. This way you can check out your compiled file's code and data contents, without doing Disassembling which would not recognize the data sections. You can change its default filename in the Setting DebugCodeFile or in the Settings Xml file.
When the Setting OutputSaveInfoFile is Enabled, now Atari DOS (.xex) files create the Info file about memory usage. The Atari 800 example file has been updated to utilize this feature.
I've been asked by several people to add a way to dump all Labels and Memory Addresses into a Debug file.
It was possible to do this earlier by specifying at least one Breakpoint, but this method seemed to have discoverability issues, not to mention that the output file could not be customized and it used a somewhat unusual VICE Monitor debugger format.
With this change the Debug file can be saved on demand using .setting "Debug", true or it's always saved when a Breakpoint is specified.
The default format has been changed to a more generic one, as it will likely need to be customized by the user anyway. If you did use the VICE Monitor debugger format, it can be recreated in User Settings with ease.
Intel 8085 with standard and undocumented instructions
There is a new setting "DebugCommand" which controls what debugger should be launched with the compiled program, if .setting "Debug", true is set.
The new -g command line option overrides the "Debug" setting to be True, so if Debug is normally not set, but there is a valid "DebugCommand" setting value and you launch the new Build & Debug command in VS Code, then the compiled program launches in your chosen debugger. Or you can just set up an emulator there and just launch the file without debugging while also saving the "debug.txt" file with the used global labels and memory addresses.
The updated Visual Studio Code Extension selfishly assigns default keyboard shortcuts to the Retro Assembler commands:
The command Build is assigned to the keys Ctrl+Shift+B
The command Build & Start is assigned to the keys Shift+F5 and also to F6
The command Build & Debug is assigned to the key F5
These commands now save the active document before compiling.
This version features huge improvements, something I planned to do for quite some time.
The assembler now handles Labels within their own Namespace Context, where Gobal Labels are in the Global Namespace, but Labels defined inside a Macro's code block are under the Macro's "Calling Instance" Namespace Context. This means that Macros no longer close Local Labels when they are called in the source code, and Macros can call other Macros from within, technically even themselves if you are careful enough, without running into "That label already exists" issues.
This also means that the Regional Labels like @@MyRegionalLabel are now deprecated because they are no longer necessary within a Macro's code block. The assembler shows a Warning for these and you need to update them to be Normal Labels. The feature will be completely removed in a later release.
The Debug text file shows Normal and Local labels with their namespaces and instance counters. The Label Printout's output format changed accordingly, too, and optionally it can print Local Labels along with the Normal Labels. See the Settings DebugAddLocalLabels and ShowLocalLabelsAfterCompiling.
These values can be used to identify specific Normal Labels within a Macro's generated code, and these can be referenced from outside the Macro too, in the format of MacroName_2.LabelName where "2" is the 2nd calling instance of the Macro in this example. The first instance doesn't get such a modifier. However this is not recommended, but it's there for experts who need to make their code behave this way for one reason or another.
These changes carry the risk of breaking existing source codes, but only if you used something incorrectly to begin with, or implemented something in a hacky way. These should be easy fixes for most coders.
Also some additional news: the "Windows" version of the assembler is updated to 2020.4 and available on the download page as a separate package. This uses .Net Framework 4.8 and can run using Mono. I can keep this version updated until the project starts using language features that are limited to C# 8.0 or later, so it's best to switch to the .Net Core version.
In this new version I added support for the Atari DOS file format, which uses the .xex extension. This file format can load one or more Chunks of data to the chosen memory locations, and it can optionally auto-start the program after loading. You need to use Segments to make this work, but everything else is automated. Check out the Atari 800 example project's source code and read about this addition in the documentation.
Hello World example code loaded and launched in an Atari 800 emulator
The Windows version has been updated too, and now it checks a different URL for updates. There won't be any real
deviation from the .Net Core version though, it may just stop getting updated at a certain point.
In this update I added a new .namespace directive, which can create and use user-defined Namespaces for Labels. If your project and workflow finds a use for it, you're in luck. It can be really powerful in the right hands, but it's probably unnecessary for most coders.
The VS Code Extension and the Notepad++ files have been updated to recognize this new directive.
The .generate directive got a new "random" mode to add an array of one or more random bytes.
The Atari DOS files with the .xex extension are now loaded and processed by the Disassembler as Atari DOS would, by processing each Chunk of data and loading them at the correct memory addresses. The Launcher Chunk is ignored by the loader, otherwise those files would be listed from $02e0
For developers who need to integrate Retro Assembler into a .Net Core project, the retroassembler.dll file offers a few Compiler functions that can be useful in unit tests.
In this new update I added a couple of new features:
I added a new directive .format to replace the old .setting "OutputFormat" solution. It's strange I haven't done this sooner, but now it's here.
I added a new Setting HandleLongBranch. The instructions that use relative addressing, typically branching instructions like bne or beq can only handle a certain address range, especially on 8-bit CPUs. When this range is exceeded, the assembler shows an error message about it. If you enable this setting, the assembler tries to resolve these errors by automatically replacing the generated code with a counterpart that can handle long jumps to absolute addresses.
Label  nop
(Lots of instructions here, over $80 bytes worth)
bne Label
(Other instructions)
This fails because Label is way too far away for a relative address jump. The assembler will compile this instead:
Label  nop
(Lots of instructions here, over $80 bytes worth)
beq AfterJmp  //Branch counterpart for "bne"
jmp Label     //Jump to an absolute address.
AfterJmp      //The label that's accessible as a short relative jump.
(Other instructions)
It's handled like this on 6502, 65C02 and 65816, with all the branch instructions of these CPUs. On Z80 and Gameboy CPUs the case is simpler, the jr instructions get replaced with the appropriate jp instructions.
Of course this is not ideal if your goal is writing code that can be relocated to any memory address, but that's rare and then you surely know what you are doing. The feature is not turned on by default, but if you need it, and most people likely would, it can be enabled, even for just a section of the code, by .setting "HandleLongBranch", true
The rest of the changes can be filed under Good Housekeeping:
The .if directive block no longer closes @Local labels, so you can reference @Local labels created before and after the .if block.
Setting AllowUndocumentedInstructions added and set to True by default. This makes undocumented instructions enabled for participating CPUs, but you can disable this manually in your source code (or in the Settings Xml file) if you want to turn them off.
The -u command line switch for undocumented instructions is now used only in Disassembler mode, where it matters to select it from the command line.
The -L command line switch has been replaced by -l, but the old switch option still works for VS Code's Build & Launch
Setting LaunchEnabled has been renamed to Launch. The old name still works, but shows a warning.
The VS Code extension and the Notepad++ files handle the new .format directive, with Code Snippets.
I seem to be on the roll these days. My friend Josh at Gang-Gang Studios (who is working on a truly amazing game) asked whether Functions could work similarly to Macros – they won't get included if they are not referenced by the source code itself. I've been wondering about the same recently and it seems like I managed to come up with a good solution to this. It wasn't easy, had a bit of an Edison moment with the thousand ways you can't make a light bulb, but at the end it worked out.
There is a new Setting "OmitUnusedFunctions" for this, which is enabled by default. If your code requires a behavior where all functions are compiled into the binary, you can disable it in your code or in the Settings Xml file.
I also added a new default Segment called Lib (short for Library), which got its .lib shortcut directive. This is placed between the Code and Data Segments, so if you have a large library you need to include, you can utilize this Segment to separate the Functions from the Code Segment's contents. Of course this is optional, or you can use a custom Segment for this purpose.
There was a serious bug in the Long Branch handler, it has been fixed.
I also added ATASCII (Atari ASCII) and ScreencodeAtari support in the .encoding directive. ATASCII is pretty much the same as normal ASCII, but certain control characters use different byte values.
Now that we reached a new year and Microsoft is consolidating .NET Core and the .NET Framework into a merged version, Retro Assembler is now built for .NET 5.0
If you've been following the MEGA65 development in the past few years, you might be as excited as I am that it will be available for purchase soon. Quite possibly, maybe. But now that at least some lucky people laid their hands on the limited developer version, you may find it useful that Retro Assembler got support for the MEGA65 45GS02 and the plain CSC 4510 CPUs. Nothing can stop you now from developing for the MEGA65!
Beside this I attempted to standardize the 65816 source code a bit, so in instructions that use the Stack Pointer, the assembler accepts both SP and S as register name. The disassembler now shows SP.
The Notepad++ language files and the Visual Studio Code Extension got support for the new CPUs and for the SP register.
It's been a while since the last update. .NET 6.0 LTS is already available for all supported platforms, so now Retro Assembler is built for .NET 6.0 and the purely Windows version is still built for .NET Framework 4.8
There's not much change in the assembler itself, but I found some bugs in the expression evaluator and fixed those.
(This post has been updated for the latest version of the assembler.)
Visual Studio Code is perhaps the best programming environment to use Retro Assembler with. I have a frequently updated Extension in the VS Code Marketplace that offers multiple themes, syntax highlighting and command execution integration. Here is a screenshot of the latest Blue theme, showing a code file used for highlighting testing.
Setting it up is easy. After you installed it, click on the Extensions icon on the left side, or choose View -> Extensions. Enter Retro Assembler into the search field and install the extension from the marketplace. Choose one of the offered color themes for the assembler. You can change this later in Preferences -> Color Theme
(The Preferences menu option will be referenced below, so I better clarify that it's under File in Windows and Linux, and under the application name Code on macOS.)
For best practices select the installed Retro Assembler Extension on the Extensions page and read the Details page. (In an ideal world this is where this guide would finish.)
Settings
Go into Preferences -> Settings and search for Retro Assembler. Or you can just open its section up directly under the Extensions tree branch. You'll find 3 editable fields.
Retroassembler: Path
You have to enter the full path to the Retro Assembler executable file that you already installed somewhere. On Windows you should use the "retroassembler.exe" file. On other systems you need to enter the command "dotnet ~/retroassembler/retroassembler.dll" substituting the actual directory path from your system. If you followed my .NET installation guide, you can use that command alias ra (or similar) that you created for this.
Retroassembler: Args
Optional command line arguments that will be passed in for the assembler when you compile the selected code file. Refer to the documentation.
Retroassembler: Mainfile
If you are working on a bigger assembly project with multiple files, perhaps even in a deeper directory structure, you can enter the full path to your main code file that should always be compiled, instead of the currently edited file.
This whole Settings is saved as a JSON file and can be edited directly by clicking on { } on the right side. Here are my settings, for inspiration, in case you also need to disable visible white spaces, use tabs, and enjoy a cleaner editor interface in general.
Go into Preferences -> Keyboard Shortcuts and search for retroassembler. You'll find 3 editable commands. Bind your desired keyboard shortcuts to them if you want to alter the defaults.
Retro Assembler: Build
This opens the Terminal and compiles the currently edited file, or the Mainfile if set in Settings.
Default shortcut: Ctrl+Shift+B
Retro Assembler: Build & Start
This opens the Terminal and compiles the currently edited file, or the Mainfile if set in Settings. It also passes in the -L command line argument to the assembler, which can start the compiled binary file with an emulator. In the compiled source code file you need to have a line similar to this example:
This opens the Terminal and compiles the currently edited file, or the Mainfile if set in Settings. It also passes in the -g command line argument to the assembler, which can start the compiled binary file with a debugger. In the compiled source code file you need to have a line similar to this example:
Visual Studio Code is a great editor but needs a little help with the file type detection. There wouldn't be much use to see 6502 instruction highlighting in a Z80 assembly code file, so you need to tag your files with the CPU type you use in them. You can do this by adding a secondary file extension between the file name and the .asm (or .s, .inc) extension, like this:
MyCode.6502.asm
MyCode.65c02.asm (Use this tag for 65SC02, too)
MyCode.65816.asm
MyCode.4510.asm
MyCode.45gs02.asm
MyCode.mega65.asm (Same as 45GS02)
MyCode.4004.asm
MyCode.4040.asm
MyCode.8008.asm
MyCode.8080.asm
MyCode.8085.asm
MyCode.gameboy.asm
MyCode.z80.asm
Code Snippets
Using built-in features IntelliSense and Code Completion, the extension can help entering Directives like .macro and it can display a short description and examples for each. Just type "." and hit Ctrl+Space to show the available Directives, or you can start typing what you need and hit Tab to insert the Code Snippet for the chosen Directive.
These helper entries don't list all possible parameters and full description due to the space limitation in the code editor window, but the most common cases are covered. It makes writing code a lot easier. For further information on the minute details you should still refer to the assembler's documentation.
Get to work!
Now you're ready to code for some good old CPUs. Just edit and save your files as usual, then press the keyboard shortcut you set up for Build or Build & Start to compile your selected file. You will see in the terminal window slotted somewhere inside the IDE whether your code compiled correctly or it has some error you need to fix. You can Alt+Click the VS Code link of the error report to open the referenced file and jump to the problematic line of code.

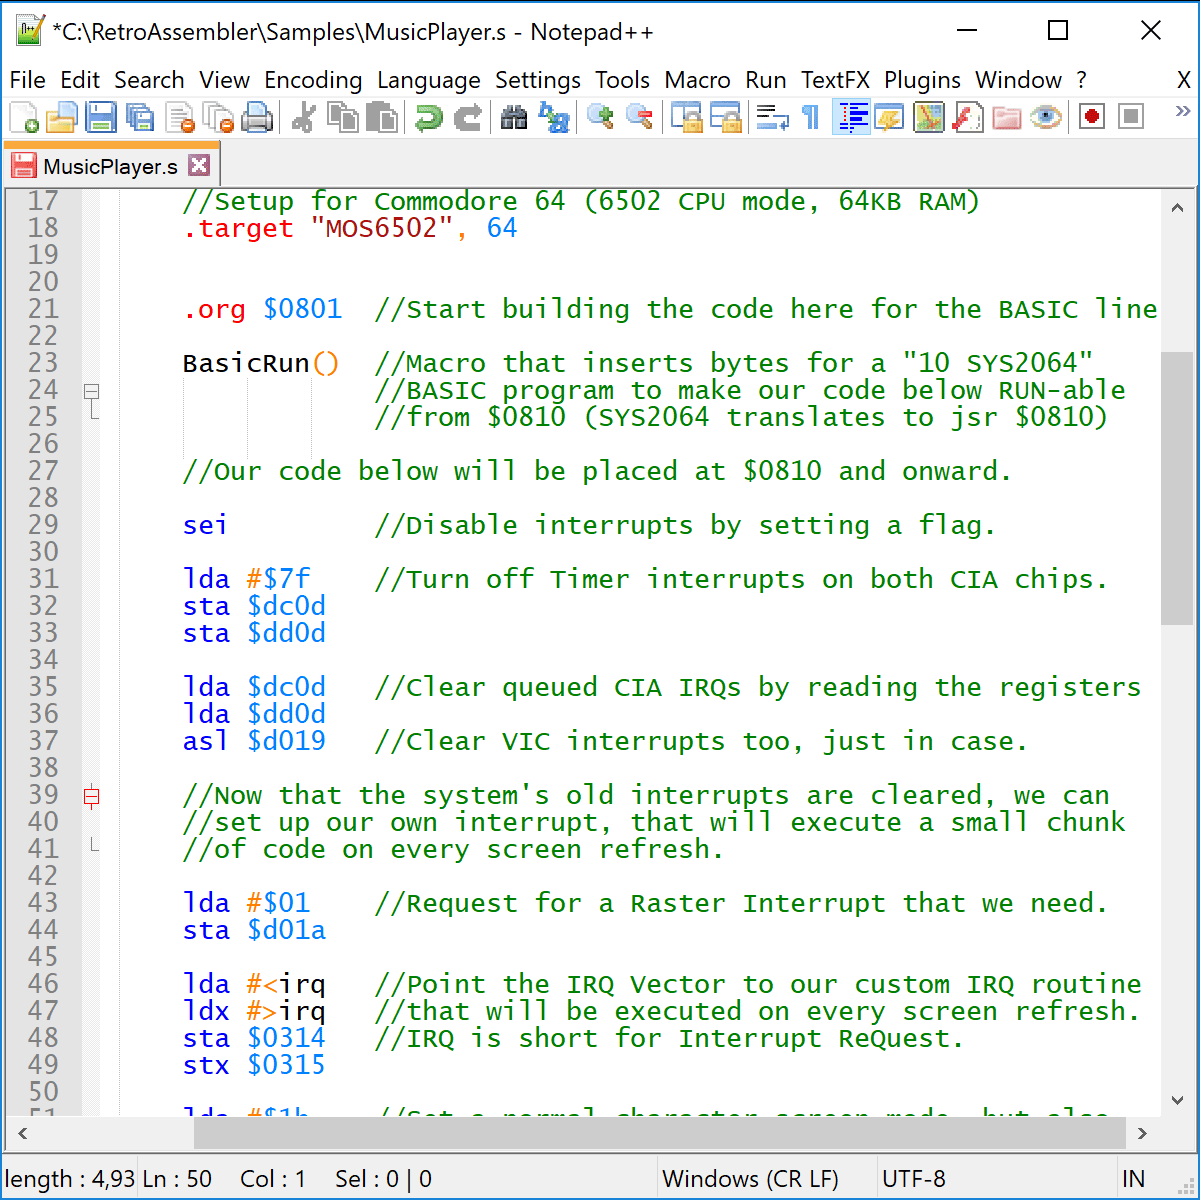 Retro Assembler – Commodore 64 source code in Notepad++
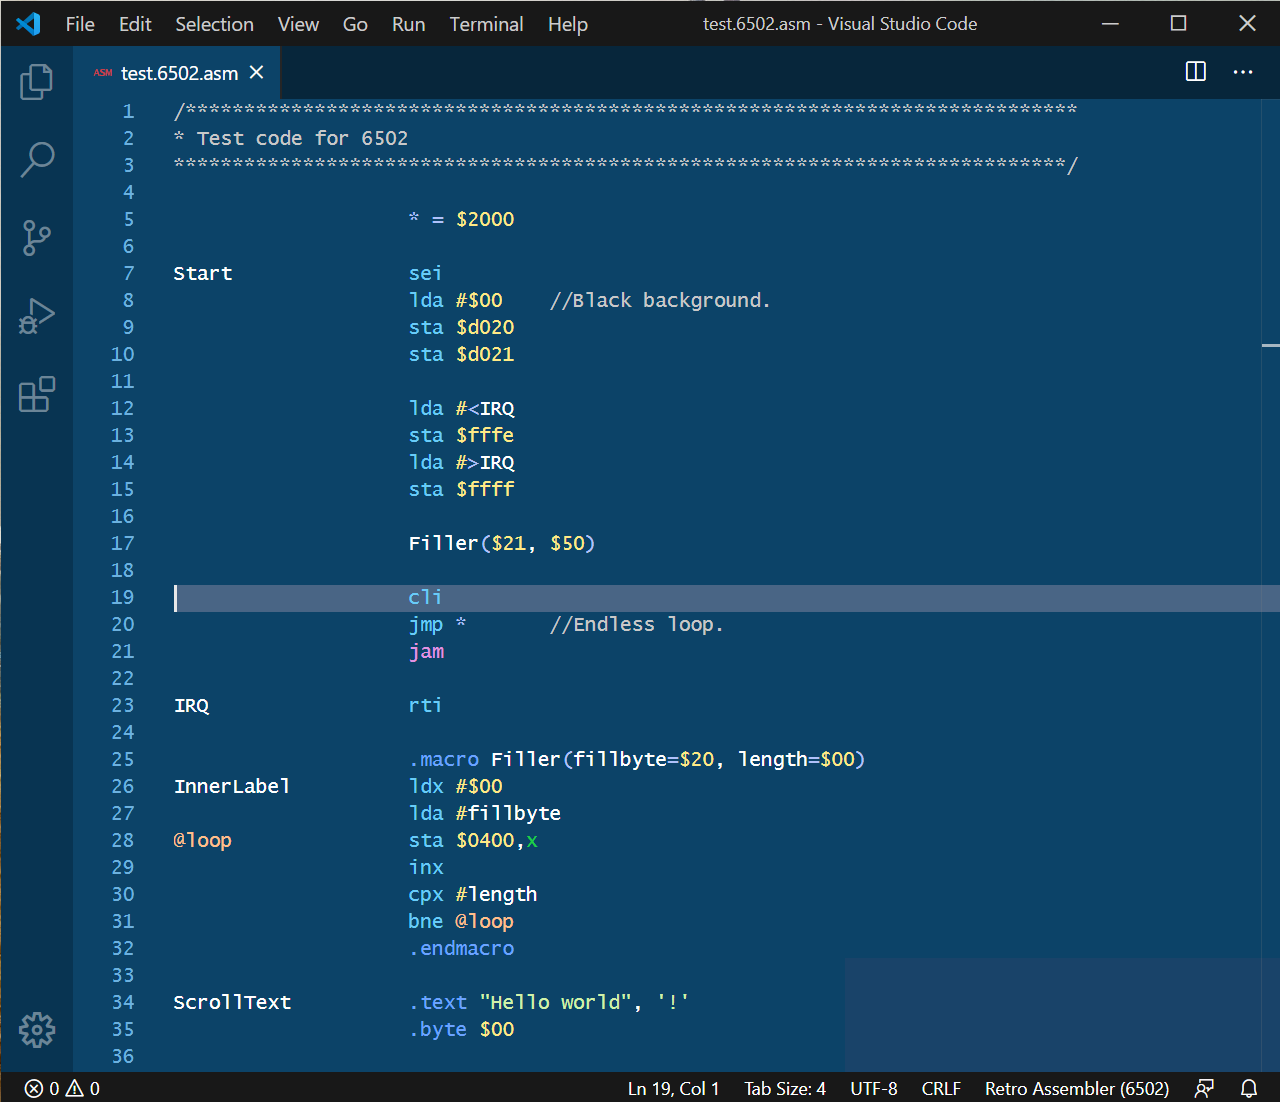 Retro Assembler in Visual Studio Code
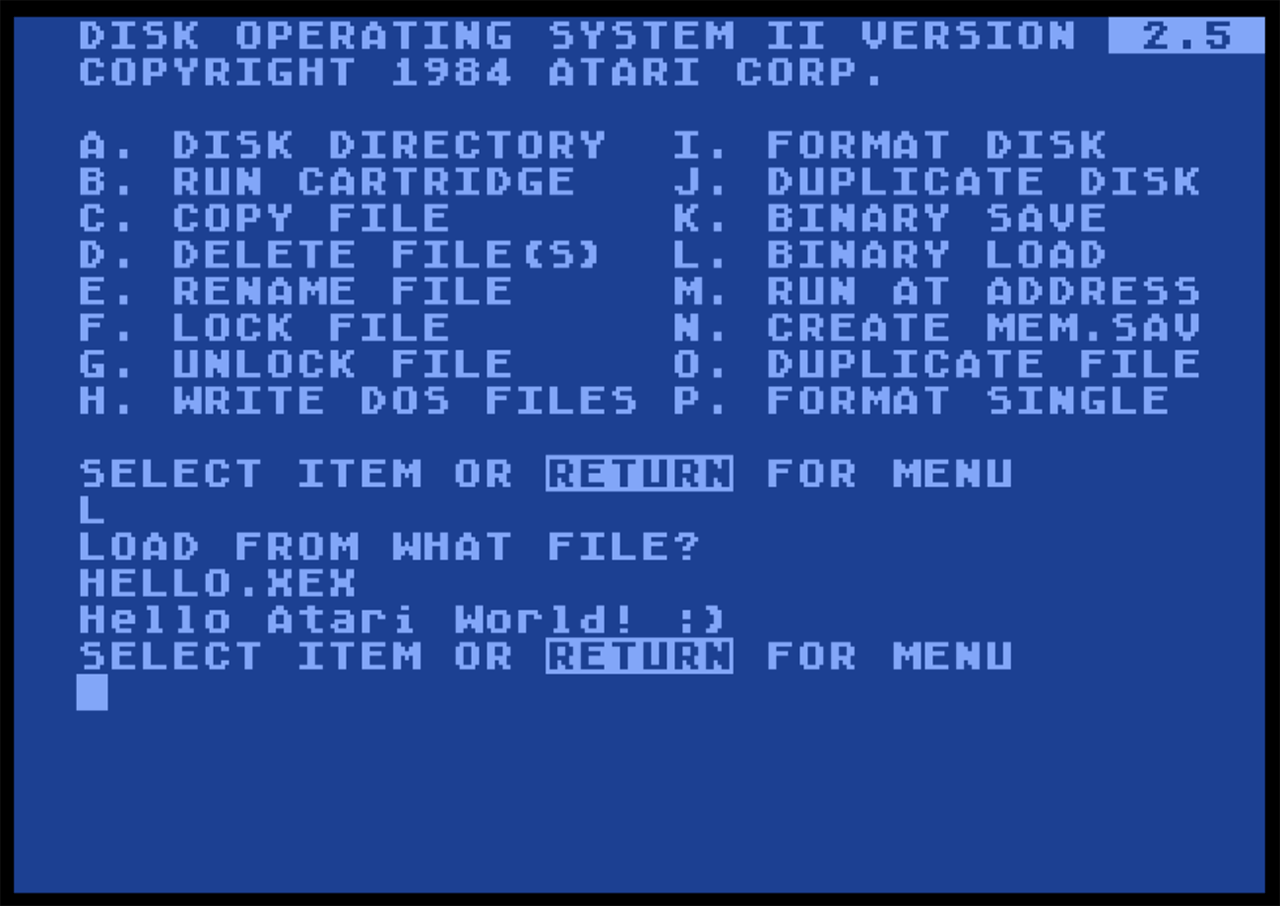 Hello World example code loaded and launched in an Atari 800 emulator