How To Enable JSON Compression in IIS
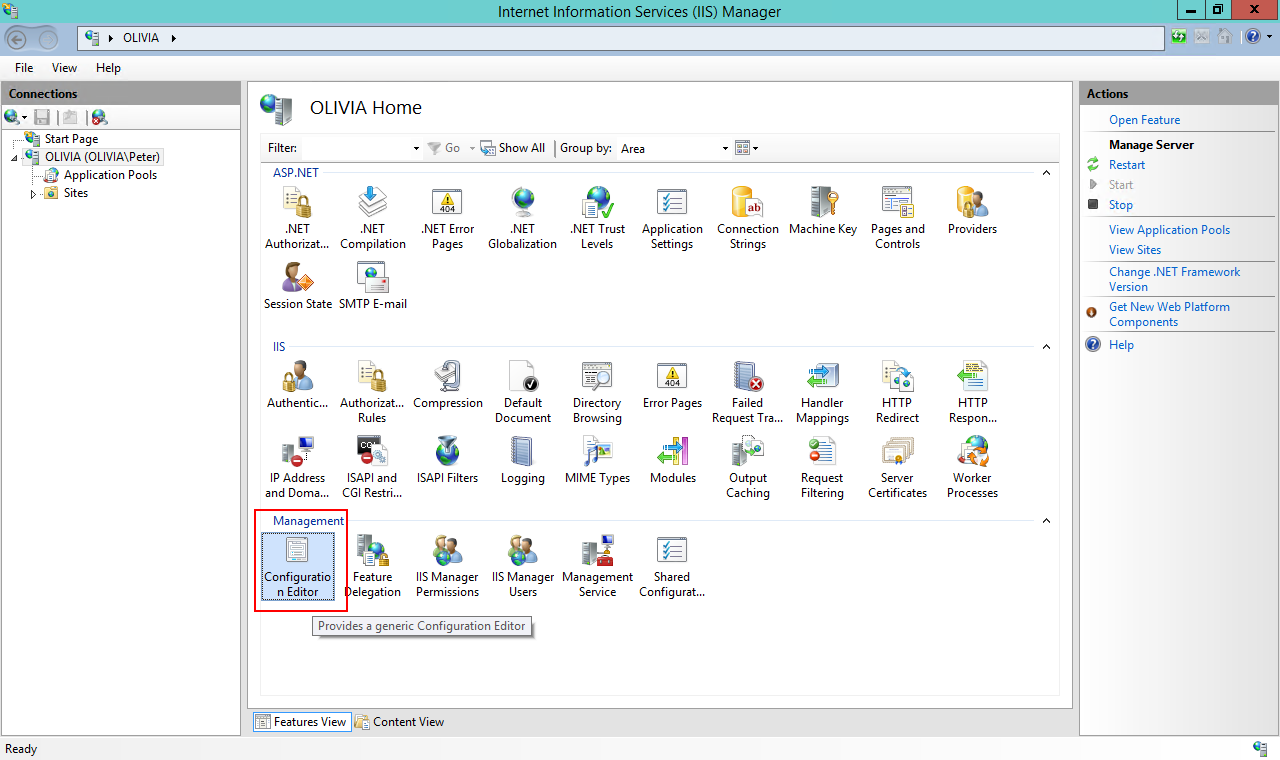
November 17, 2017⚑ServerIISIn the past year most of my web work has been reduced to the development of Web APIs with clear JSON request and response. The response sent by the web server can be quite big, so it's a good idea to enable dynamic compression on it. However, even when you enable compression in IIS, it won't compress files sent with content type application/json. Not by default. Luckily the compression settings can be configured. To do it for the whole web server, open the settings panel for the web server root (these settings are applied to all websites) and open the Configuration Editor in the Management section.
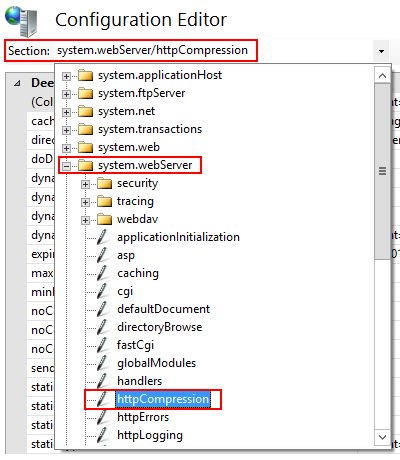
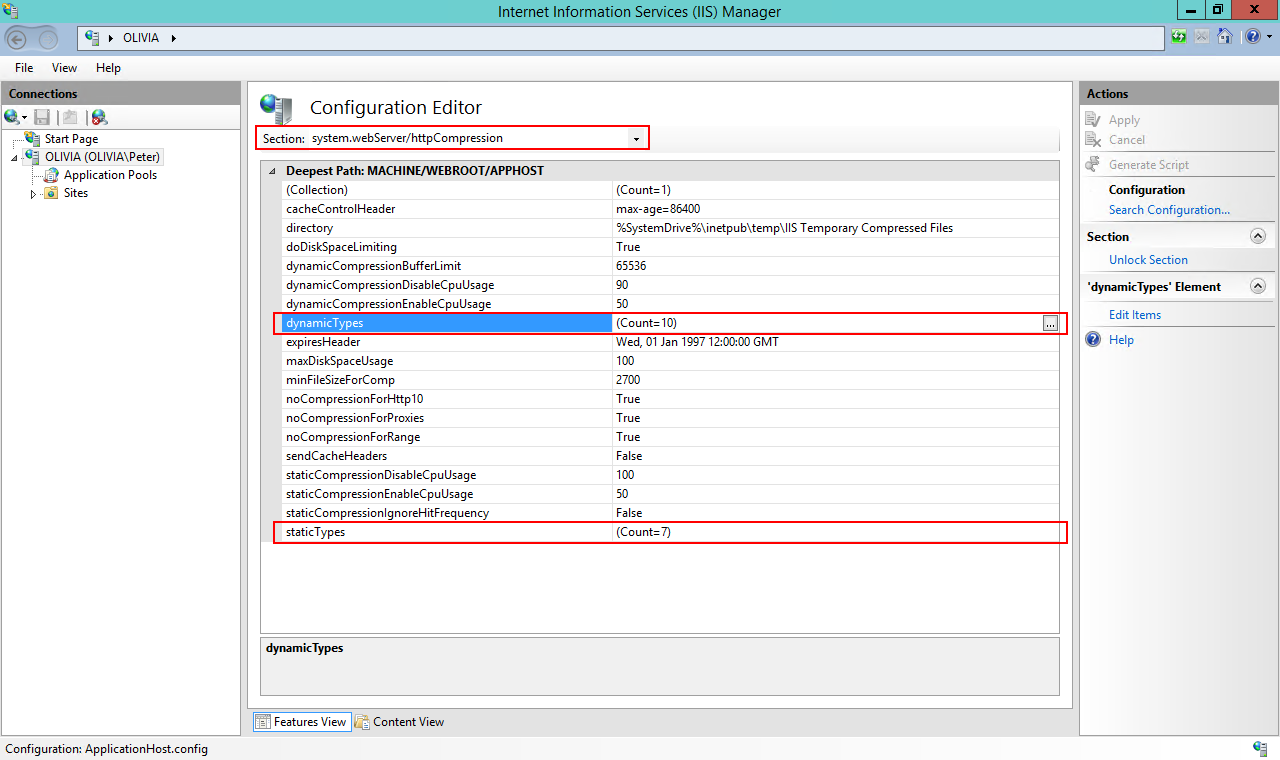
 In the Configuration Editor there is a Section selector on the top. Open the section system.webServer and choose httpCompression to access the dynamic and static file compression settings. As you can see, there are plenty more you can adjust in IIS, but I'd say it's best to leave most settings as vanilla as possible and apply adjustments in individual web.config files. But in this case it won't hurt to enable JSON compression for the entire web server.
Here you can set up the content types handled by the file compressor. Obviously it's not worth to GZip a Jpeg file, but text based files are good candidates. The types can be set for Dynamic and Static file compression individually.
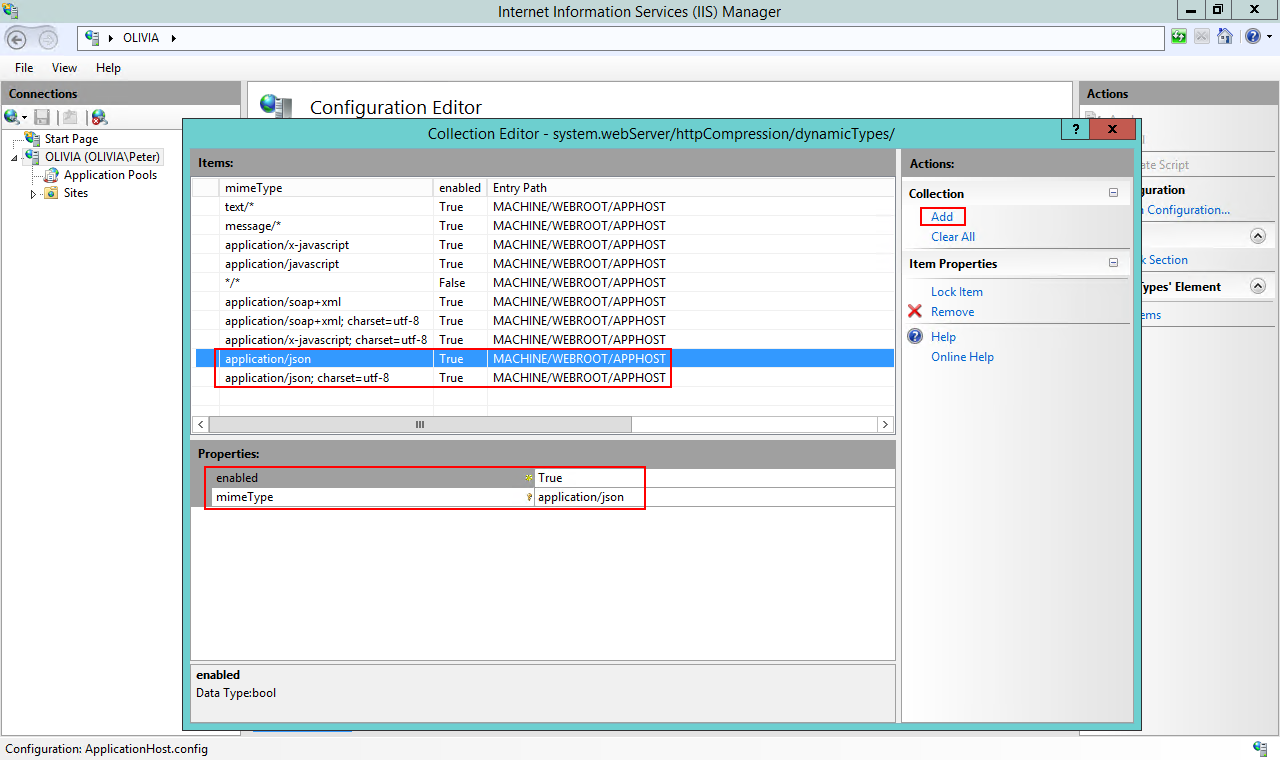
In Dynamic Types add a new MIME type to the list: application/json and mark it as Enabled (True). You may also add application/json; charset=utf-8 just to be on the safe side.
Then do the same additions for Static Types, you may need it in certain situations. Don't forget to actually enable compression in the server root's IIS section, by going into the Compression editor.


